2906
Gypsum is a natural material that has found application in medicine.
Due to its unique properties, gypsum is actively used in dental practice, as an aid in dental prosthetics or bite correction.
And this is the only material that has not lost its relevance over time.
What is dental plaster
To understand the essence of what this dental material is, what stages of processing it goes through before starting to manufacture structures from it, it is worth finding out how it differs from natural gypsum and how it is obtained.
The territory of Russia is rich in minerals, including gypsum, the main deposits of which are concentrated in the Tula, Irkutsk regions, Perm and Krasnodar territories.
When mined, it appears as solid crystals of green, pink, yellow or brown. Pure gypsum is colorless, but due to the admixtures of quartz, pyrite, carbonates, and clay, this natural material acquires color. It is extremely rare without impurities.
Before plaster becomes suitable for use in dentistry, it undergoes special processing. It needs to be converted from its natural state - calcium sulfate dihydrate - to calcium sulfate hemihydrate. To do this, the material is crushed to a powder state. The crushing process in the mill is accompanied by simultaneous heating.
Main methods of obtaining:
- under conditions of high pressure - in an autoclave, for 6 hours at a temperature of 120-124 °C. After this, the material is dried, resulting in α-hemihydrate;
- under normal atmospheric pressure - for 12 hours at temperatures up to 165 °C. In this way the β-hemihydrate is obtained.
The resulting powder is carefully sifted and the following is added to its composition:
- catalysts and inhibitors - substances that affect strength characteristics and solidification rate;
- dyes that give a wide variety of colors;
- flavorings (for example, the taste of “mint” - to increase the patient’s comfort).
The essence of the process described above comes down to the fact that as a result the material acquires strength and the ability to set. The finer the powder is ground, the higher these characteristics are. Compliance with the temperature regime is of particular importance: insufficiently high temperatures leave excess water in the plaster, which prevents its hardening.
When the temperature is exceeded, all the water evaporates and anhydride forms, which sets too quickly. If absolutely all the water evaporates when heated, a material is formed that is incapable of setting. After obtaining hemihydrides, dental materials are prepared from them for various purposes.
Composition and technical characteristics
In terms of its composition, dental gypsum is calcium sulfate dihydrate (CaS04 - 2H20). This is a sedimentary rock with a layered crystal lattice, formed by precipitated sulfate salts.
Gypsum is traditionally mined in lakes and lagoons from aqueous solutions through drying. Also, deposits of natural gypsum are found in mountainous areas along with limestones, rock salt, and clays.
Temperature treatment (firing or calcination) transforms the substance into calcium sulfate hemihydrate (CaS04)2 - H20, further heating - into anhydrite.
In dental practice, a semi-aqueous modification of gypsum is used, which has a number of necessary characteristics, namely:
- dimensional stability and accuracy;
- excellent color contrast;
- environmental safety;
- lack of taste and smell;
- insolubility under the influence of saliva;
- low shrinkage rates;
- affordable price.
When choosing an auxiliary material, it is necessary to pay attention to strength indicators, the degree of water absorption, the absence of metal impurities, the proportion of hydration water and volumetric expansion values.
Manufacturers supply gypsum powder in bags made of paper or cellophane impregnated with a water-repellent substance and packaged in jars equipped with ground-in lids. The packaging must contain information about the trade name of the product, information about the manufacturer and supplier, gypsum class, scope of use, color characteristics, net indicators. Also on the packaging there are recommendations about the rules and shelf life, and the batch number.
How do you get the material?
The crystals are colorless and transparent. However, all kinds of impurities, such as clay, pyrite, quartz or carbonate, color them in various shades - from pink to black. To obtain dental gypsum, the material at the first stage is cleaned of impurities and crushed to a powder state.
Next, the natural material is heated to a temperature sufficient to remove some of the water. There are several manufacturing methods. As a result of their use, medical, model plaster and super plaster are obtained. The composition of medical gypsum of all varieties is identical - (CaS04)2 - H20.
The material differs in structure and particle shape:
- The hemihydrate obtained by firing is medical gypsum (β-hemihydrate). The process of its manufacture is heating in an open boiler until some of the moisture evaporates. The material turns out to be porous and loose. Before use in dental practice, the powder is mixed with water in a 2:1 ratio.
- Model plaster (a-hemihydrate) is produced by autoclaving. When mixing non-porous powder with water, the following proportions are used - 5 parts of gypsum particles to 1-1.5 parts of water.
- To obtain super dental gypsum, the boiling method with the addition of chloride (magnesium or calcium) is used. Chlorides act as deflocculants, preventing the formation of flocs and promoting particle separation. When adding water, the traditional ratio is 5:1.
This is interesting: How to quickly get used to removable dentures: tips and recommendations
Video from a specialist:
How does medical plaster work?
For dental purposes, gypsum dihydrate is heated under the required pressure, mixed with water, after which the entire mixture hardens. The degree of hardening of gypsum is influenced by the following conditions: temperature, dispersion, mixing technique, quality and presence of impurities.
For conservative and post-surgical treatment of fractures and soft tissue damage, immobilization with plaster casts is widely used, which is the best means for external fixation of extremity bone fractures.
It is believed that the method of preparing and applying GP was first described by the Dutch physician A. Mathisen (1852), and in 1854, during the Crimean War, it was described and widely used by M.I. Pirogov. He also paid great attention to caring for the condition of the casted limb.
Gypsum quality control
As mentioned earlier, the quality of gypsum is directly proportional to proper firing and other factors - humidity, amount of water for mixing, etc. In connection with these parameters, there is quality control of gypsum, which consists of testing:
- for strength - a ball is made with a diameter of 1.5-2.5 cm. Descends from a height of 1.5 m to the floor - normally remains intact;
- for flowability - gypsum powder is compressed in a fist - normally there should be no lumps left in the palm, plaster seeps between the fingers;
- for humidity - the plaster is heated on a metal plate with a mirror held over it. If the plaster is of high quality and not damp, then the mirror will not fog up;
- for hardening - a paste-like mass is made (2 parts water and 3 parts gypsum), which hardens within 10-12 minutes and does not crumble when broken;
- for viscosity - make a plaster splint (4-5 layers), apply it to the forearm, after hardening it should retain its given shape, not crumble or delaminate;
- odor - if the gypsum is unsuitable when mixed with water, the smell of hydrogen sulfide (rotten eggs) appears.
Composition and technical characteristics
In terms of its composition, dental gypsum is calcium sulfate dihydrate (CaS04 - 2H20).
This is a sedimentary rock with a layered crystal lattice, formed by precipitated sulfate salts. Gypsum is traditionally mined in lakes and lagoons from aqueous solutions through drying. Also, deposits of natural gypsum are found in mountainous areas along with limestones, rock salt, and clays.
Temperature treatment (firing or calcination) transforms the substance into calcium sulfate hemihydrate (CaS04)2 - H20, further heating - into anhydrite.
In dental practice, a semi-aqueous modification of gypsum is used, which has a number of necessary characteristics, namely:
- dimensional stability and accuracy;
- excellent color contrast;
- environmental safety;
- lack of taste and smell;
- insolubility under the influence of saliva;
- low shrinkage rates;
- affordable price.
When choosing an auxiliary material, it is necessary to pay attention to strength indicators, the degree of water absorption, the absence of metal impurities, the proportion of hydration water and volumetric expansion values.
Manufacturers supply gypsum powder in bags made of paper or cellophane impregnated with a water-repellent substance and packaged in jars equipped with ground-in lids. The packaging must contain information about the trade name of the product, information about the manufacturer and supplier, gypsum class, scope of use, color characteristics, net indicators. Also on the packaging there are recommendations about the rules and shelf life, and the batch number.
Classification
According to the requirements of the international hardness standard, the following types are distinguished:
— soft gypsum, used for making impressions in orthopedic dentistry;
- ordinary (medical) plaster, used in general surgery and orthopedics;
— hard plaster, intended for making models of jaws in dentistry;
— especially strong plaster, used to create collapsible models of jaws;
- ultra-strong plaster, intended for models in dental orthopedics that require ultra-high strength, made with the addition of synthetic components.
When mixed with water, after 5-7 minutes the gypsum begins to harden, gaining strength. The material acquires its final characteristics and hardness after complete drying.
Types of gypsum in dentistry
There is a classification of dental plaster, according to which this material is divided according to hardness and purpose.
- Low hardness , intended for impressions. The softest and most pliable of all materials used in the dental industry. Characterized by low expansion and high hardening speed. It is used to create full or partial impressions, including when working with jaws that are completely devoid of teeth.
- Medical alabaster . It is an auxiliary material often used to recreate anatomical models used in various orthopedic structures. This class is not suitable for working models, as it has low strength characteristics, but is indispensable for technical work.
- High strength solid . Materials belonging to class 3 are used for prosthetics of partial and complete dentures. They are also suitable for making the base of collapsible permanent structures. It has decent strength indicators.
- Ultra-strong dental plaster of class 4 with reduced expansion. High strength and almost complete absence of expansion of the material when working with it makes this type of gypsum indispensable both for creating collapsible models and for carrying out combined dental work.
- Heavy-duty with adjustable expansion rate . A rare class of material with admixtures of various synthetic components. Articulating plaster is intended for working with high-precision models.
For complex structures, they work with several types of raw materials at once. For example, the base part is made from class 3 gypsum, and supergypsum is used to create the alveolar process and teeth. If the model must be resistant to high temperatures (up to +1000 degrees), quartz sand is added to the mixture. If it is necessary not to lose properties at +1500 degrees, special fire-resistant compounds should be used.
Model. definition. Types of models.
MODEL.
DEFINITION. TYPES OF MODELS. MODEL is a positive representation (accurate reproduction)
https://www.youtube.com/watch?v=https:accounts.google.comServiceLogin
surfaces of hard and soft tissues located on the prosthetic
bed and its borders.
Workers - who make dentures and devices.
Auxiliary - model of the dentition of the jaw opposite
prosthetic.
Diagnostic, control - models that are subject to study for
clarifying the diagnosis, planning the design of a future prosthesis, or
record the initial state of the oral cavity before prosthetics,
orthodontic treatment.
How to apply dental plaster
The manufacture of a high-quality gypsum structure is impossible without properly organized preparatory and working stages. For example, improper storage of consumables, failure to maintain the proportions of powder and water when mixing, dooms even the most advanced technique to failure. What do you need to know about using dental plaster?
Preparation for use
Before directly mixing the material used, you should make sure that it has been stored correctly and also follow some operating rules.
The basic principles of its storage and use are simple:
- Store packages with material in a dry place and avoid contact with moisture.
- It is necessary to monitor the condition of containers and tools used in work: they must be dry and clean.
- Do not mix a large amount of plaster: there should be no more than enough for two or three impressions.
- Strictly observe the proportions of mixed powder and water.
- The temperature of working plaster and water should be 20±1 °C.
- After you have poured the consumable into the water, let it submerge in it, and only then start kneading. The optimal time for manual kneading is about one minute, for machine kneading - no more than 30 seconds.
- Once the dental plaster mixing process is complete, it is important to immediately pour it into the mold to set.
- The finished model is separated from the mold immediately after cooling.
This is interesting: Dentures with suction cups - types, advantages and disadvantages, before and after photos
After you have made sure that the storage conditions are met and you have gypsum of the required quality, proceed to mixing.
Water used for mixing
To prepare the gypsum composition, settled tap water is used; the temperature should not exceed 19-210.
When using hard water, the hardening period of the mass is reduced. In this case, it makes sense to use demineralized water.
Powder addition
The powder is poured into the water evenly, but quickly enough (approximate time - 10 seconds). Then you need to wait 20 seconds until the plaster has completely settled.
Only after this can you start kneading with a spatula. The manual mixing time depends on the class of powder.
For low-strength material, the duration of this stage is 30 seconds. All other types of material are mixed for one minute.
Unboxing
According to the canons, exactly 30 minutes should pass from the moment the gypsum mass is poured to the removal of the frozen sample. To use other impression materials, unpacking is carried out after an hour.
Extension
Each class of material expands slightly as it hardens. This indicator is influenced by:
- compound;
- air humidity;
- ambient temperature.
To compare the degree of expansion of different classes, they must be placed in equal conditions.
The permissible expansion values for each class of a given material are given in accordance with ISO 6373 or EN 26873.
Following the standards, the expansion of the product should be indicated in % and after 2 hours, and the strength of the applied impact - after 1 hour (in N/mm2).
If the sample is kept at room temperature and insufficient humidity longer, its expansion decreases by approximately 30%. But in practice it is known that gypsum even needs a slight expansion - it covers the shrinkage of other materials .
How to mix dental plaster
A container and a spatula are enough for mixing. Gypsum is added to water at 20±1 °C at the rate of 100 g of powder per 22-24 ml of water. After it is completely immersed in water, we begin the kneading process. Remember: the more energetic the movements, the faster the material is mixed, and vice versa.
It can be mixed either manually or mechanically using vacuum mixers: such a gypsum solution is obtained faster and more homogeneously.
The average setting time is approximately 10 minutes. After obtaining a solution of a creamy consistency, you can pour gypsum into the mold.
Filling and modeling
Before filling the mold with the resulting solution, an impression of the jaw is first taken, which will be filled with the material. This impression is made from plaster or alginate mass. After receiving the impression, all its parts, including the smallest ones, are placed in an impression tray and secured with wax.
If the material for making the impression is very plastic, it is introduced into the patient’s oral cavity along with a spoon. Next, disconnect the spoon and remove the resulting cast. It is washed with soapy water to fill the cavities: this will make it easier to separate the cast plaster model from the cast. The impression is also treated with a disinfectant and special liquids to remove surface tension.
Pour the prepared plaster mixture into the resulting impression, while tapping and shaking it. This is necessary so that it is distributed and hardens evenly, so that hollow areas do not form during hardening.
In dental production, special equipment is currently used for these purposes - vibrating tables. As soon as the plaster in the mold loses its shine, you can begin modeling.
The following solidification phases are distinguished:
- within 30-50 seconds after adding water and kneading, the material has a creamy consistency;
- within 2-5 minutes it loses its shine, becomes thicker and more flexible, and begins to expand: this is the right time to start modeling;
- after this, within 1-3 minutes it loses its plasticity, begins to crumble, but is not yet hard and durable enough;
- in the next 5-8 minutes the material begins to generate heat and hardens: this means that it is time to separate the resulting model from the print.
How long does it take for dental plaster to harden? Complete crystallization requires 30 to 60 minutes. The higher the class of the material, the longer it takes to set. After filling the model, its base is made - a stand up to 2-2.5 cm wide. To do this, a “hill” of plaster is placed on a smooth, flat surface with a spatula, and the print is tipped onto it.
It is especially important that the bottom of the impression tray is strictly parallel to the surface being tilted, and, accordingly, the edges of the resulting base are perpendicular. Excess hardened material is removed with a spatula and a plaster knife or using trimmers.
After completing the modeling process, the finished model is carefully removed from the mold. First, the small parts are separated, then the large ones. This work requires special care, since it is very easy to damage the model during removal.
This is interesting: Advantages of telescopic dentures, design features and rules of use
Gypsum. Types and application. Advantages and disadvantages. Peculiarities
Gypsum, or calcium hydrogen sulfate, is a mineral widely used in construction, medicine and sculptural casting. When finished, it is a powder that is mixed with water, after which it gradually dries, acquiring high hardness. Its color can be white, gray or with shades of brown, pink, yellow or red. The hardness of the mineral on the Mohs scale is 2 points.
Gypsum mining
The mineral occurs as inclusions in sedimentary rocks. Its particles are presented in the form of scaly or fine-grained masses. Its deposits are usually found in clayey sedimentary rocks. Outwardly they resemble marble. The mineral is mined using the mining method.
Underground deposits are broken off from the total mass by point explosions. The extracted gypsum stone is delivered to the surface and then ground into powder. Initially, it has high humidity, so it is first dried and then baked for several hours.
The gypsum coming out of the kiln is completely ready for use.
The technological process may include additional methods for purifying the composition from impurities, which depends on the raw materials used. If the production of gypsum for medical purposes is required, then it is purified more efficiently to improve its binding properties.
Advantages of gypsum as a material
Gypsum has a number of advantages that allow it to significantly surpass the vast majority of other materials used in construction, as well as other fields.
Its undeniable advantages include:
- Light weight.
- Easy mixing when preparing solutions.
- Fast hardening.
- Short drying period.
- Moderate hardness.
The undoubted advantages of gypsum include the possibility of its easy grinding. Thanks to this, you can correct the shape of the product made from it.
Depending on the object or surface, this can be done with a file, sandpaper or a special abrasive mesh.
The listed properties, which are advantages of the material, may differ depending on the degree of grinding, cleaning and the presence of plasticizers. It is usually classified according to the degree of compression. According to this criterion, there are 12 types of gypsum.
This indicator measures the number of kilograms per square centimeter that must be applied to destroy the material. The number in the nomenclature name indicates a given number of kilograms.
For example, gypsum marked 5 has an upper compression point of 5 kg/cm².
There are 3 main areas of application of this material:
- Medicine.
- Sculpture.
- Construction.
Medical use
Purified gypsum powder is used to create a bandage to lock the limbs, which is necessary for the healing of broken bones. To do this, it is diluted in water to prepare a liquid solution. Bandages are soaked in it, which is used to make a dressing. After hardening, the bandage-reinforced solution becomes rigid, completely protecting the plastered limb from unwanted effects.
For medical purposes, only fine grinding of gypsum is used, ensuring high solidity after setting. In addition to being used to treat fractures, it is also used in dentistry. With its help, impressions of teeth are made for the further production of implants. With the advent of more modern non-staining materials, this method is becoming a thing of the past.
Plaster in sculpture
The use of gypsum has found its application in artistic creativity, in particular the creation of sculptures. For this purpose, high-quality grinding without impurities is used, similar to that used in medicine. There are two ways to use it. The first involves cutting out works from large gypsum stones, and the second involves ordinary casting.
Plaster carving is practically no longer used, since the resulting works have external defects, which is due to the heterogeneity of the natural material. In addition, this production method requires great skill and significant time investment. It is much easier to pour gypsum mortar into molds.
It hardens quite quickly, thanks to which, having an injection mold, such production can be put on stream.
Gypsum products are far from eternal, because their hardness on the Mohs scale is only 2 points, which is of course less than concrete, which scores 4-5 points. It is destroyed by mechanical impact.
Nevertheless, the advantages of gypsum include maintainability, because products made from it can be glued together, and the resulting seams can be easily sanded down with emery cloth.
After sanding, defects can be completely hidden with sufficient skill.
Construction use
Most often, gypsum is used to create plasters. Unlike cement or lime compounds, they have a more convenient consistency for work. At an average temperature of +20°, the drying time for such plasters is only 7 days. During this time, they fully gain their strength, which is 4 times faster than in the case of concrete.
Putties are also made from gypsum. They use a finer grinding fraction than plasters, due to which the resulting surface is highly smooth. This is especially important if wallpapering, and even more so painting, is required.
Decorative products for finishing are poured from gypsum. It is made from:
- Wall 3D panels.
- Wall tiles.
- Lepnin.
- Baguettes.
- Columns.
- Pilasters.
- Moldings.
- Ornaments.
- Designer sockets.
The vast majority of gypsum produced for construction purposes is used to make drywall. It is used as a level base for the quick construction of interior partitions and suspended ceilings.
Drywall is also used to level out large curvatures in walls.
Using plaster to create decorative elements
Gypsum powder is an excellent material for the production of interior decorations. Most often, 3D wall panels are made from it, as well as various products to imitate ancient architecture. With the advent of polyurethane, such interior items began to be made from it, but gypsum still remains an accessible material that is used if you want to make such decorations with your own hands.
For this purpose, 3D molds made of plastic or silicone for casting are offered for sale at quite reasonable prices. When using them, pure gypsum compounds are used. Ideally, the sculptural variety is suitable, but its cost is too high, which is not economically viable. A better choice would be to use granular plaster, sold in stores under the name alabaster.
For production, alabaster is diluted with water in equal proportions. The resulting liquid composition is poured into the mold, after which it is shaken to ensure the release of air bubbles. It is best to install it on a vibrating machine.
Its presence allows you to prepare a solution with less water added, which will subsequently have a positive effect on strength. The form is left until the alabaster sets. Usually in the summer, 25-30 minutes are enough for this.
After removing the product from it, it is set to dry, and the mold can be reused the required number of times.
Since the mold depth is usually about 20-25 mm, at an air temperature of +20°, complete drying of the casting takes about 3 days. After this, the product can be used for its intended purpose.
When using molds, they must be lubricated to ensure proper casting yield. This can be done with technical petroleum jelly, but the easiest and cheapest way is to use ordinary refined sunflower oil.
Features of working with gypsum plasters
Gypsum-based plasters can be used for application to mineral surfaces. First of all, they are suitable for covering walls made of brick, concrete, aerated concrete, expanded clay concrete, etc. They are also used to level ceilings.
Although gypsum-based plasters and putties have good adhesion, surface preparation with the application of a deep penetration primer is required. This allows you to create an impermeable film between the base and the plaster, preventing the transfer of moisture to the wall or ceiling.
This ensures that during the drying period the plaster will have enough water for the normal course of the chemical crystallization reaction between the mixed grinding of gypsum.
In the future, this will ensure higher hardness of the material and resistance to mechanical damage.
Typically, gypsum plaster can be applied to a surface with a layer thickness of 0.5 to 3 cm. Some manufacturers offer gypsum mixtures with the addition of special plasticizers and other impurities, making plastering with a large layer thickness quite possible.
Gypsum-based plaster is characterized by less pronounced sliding of the material. Thanks to this, they require less trimming of the burrs. All this contributes to higher labor productivity when using them.
Gypsum is an easily absorbent material, which is why plasters and putties based on it are unsuitable for use in bathrooms. In conditions of high humidity, the possibility of layer destruction increases many times over. To solve this problem, special moisture-proof polymer compositions are produced, but even with their use, cement plasters are still more reliable.
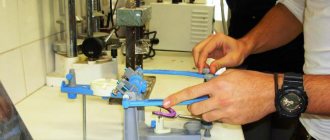
Hand kneading technology
You can get a high-quality plaster cast only if you follow the mixing sequence:
- Distilled water is poured into a special bowl, the amount of which is determined by the class of the powder.
- Gypsum powder is slowly poured into the liquid. According to standards, about 10 seconds should pass from the start of contact of the first particles with water to the end of falling asleep.
- After this, you should wait until the particles are completely immersed in water and only then start mixing with a metal or plastic spatula.
- Movements should be as energetic as possible. The consistency of the complete mixture is creamy and homogeneous.
If too much water is added, the plaster will only absorb the amount it needs. The remaining water will quickly make the structure of the material loose and reduce the accuracy of the impression. Not the best solution would be to add less liquid than required by the technology for producing the mixture. Thick plaster does not make it possible to obtain an accurate imprint due to the formation of air bubbles that simply do not have time to reach the surface due to too rapid hardening.
Taking an impression of the upper jaw on video:
Types of gypsum
First of all, it is worth mentioning two types of gypsum - selenite and alabaster. Selenite is a durable, translucent variety of gypsum with a characteristic silky sheen. It can be found in different colors - from white to red. Alabaster is obtained by mechanical processing of gypsum stone and subsequent firing of the resulting powder.
It is important to know that alabaster and plaster are not the same thing. Alabaster is used only in the construction industry, as it dries and hardens quickly, while gypsum is used in various other areas.
There are other types of gypsum - polymer, molding (sculptural), acrylic, polyurethane.
Application of inhibitors and catalysts
The strength characteristics of prints and models are affected by the rate of hardening. However, dental technicians prefer not to use special accelerators and retarders of the process. Additives can degrade the quality of products.
The optimal solution is to select high-quality raw materials and adhere to production technology (choice of temperature conditions, powder dispersion, intensity of mixing components).
But in rare cases, it is also permissible to use hardening optimizers, which are:
- table salt solution, potassium nitrate (catalysts);
- ethyl alcohol (5%), sugar solution (5-6%), borax solution (2-3%), wood glue (inhibitors).
Accelerators (catalysts) reduce the strength and hardness of future casts. Inhibitors, on the contrary, increase these characteristics. Additives cannot be used when creating jaw models, as the likelihood of errors and inaccuracies increases. Inhibitors and catalysts are added both to water and directly to gypsum powder.
Diverse orthopedic material is widely used in dentistry due to its ease of use, affordable price, and excellent aesthetic and functional characteristics. By following the technique of making impressions and models, it is possible to create high-quality impressions that facilitate diagnostics and measures for dental prosthetics.
Abstract on the topic “Gypsum in orthopedic dentistry”
Contents 1. Composition and properties of gypsum 2. Classification and application 3. Rules for working with gypsum 4. Mixing gypsum 5. Obtaining models of jaws from gypsum List of sources used
1. Composition and properties of gypsum.
Gypsum is one of the most common auxiliary materials used in dental production.
Attention!
If you need help with academic work, we recommend turning to professionals. More than 70,000 experts are ready to help you right now.
Cost calculation Guarantees Reviews
It is a natural material formed by precipitation from solutions rich in sulfate salts or by weathering of rocks. Gypsum occurs in nature in the form of a mineral - aqueous calcium sulfate salt CaSO4x2H2O. In orthopedic dentistry, calcined or semi-hydrous gypsum (CaSO4)2xH2O is used. To obtain semi-aqueous gypsum, natural gypsum, purified from impurities, is crushed in special crushing plants in gypsum mills to a fine, homogeneous powder. Then the crushed gypsum is loaded into digesters (gypsum kilns) and fired at a temperature of 140-190° for 10-12 hours. Depending on the firing temperature, pressure, and time, different grades of gypsum can be obtained, differing in hardening time and strength.
Under certain heat treatment conditions, semi-aqueous gypsum can have two modifications - α- and β-hemihydrates:
– α-gypsum is obtained by heating gypsum dihydrate at T = 110-1150C under a pressure of 1.3 atmospheres. This plaster is called autoclaved super plaster. α-gypsum has a dense structure and a small specific surface area, its water requirement is lower and its strength is higher. Its setting time is longer;
– β-gypsum is obtained by heating gypsum dihydrate at T = 95-1050C and atmospheric pressure. β-modification crystals form a capillary-porous structure, have a developed internal surface, and are more reactive. They require a lot of water to dissolve and have reduced strength.
After firing, gypsum is ground, sifted through special sieves and packaged in special paper bags or barrels. When gypsum hemihydrate is mixed with water, dihydrate is formed, and the entire mixture hardens. This reaction is exothermic, that is, it is accompanied by the release of heat. The setting of gypsum occurs very quickly. Immediately after mixing with water, thickening of the mass becomes noticeable, but during this period the gypsum is still easily molded. Further compaction no longer allows for molding. The setting process is preceded by a short period of plasticity of the gypsum mixture. Mixed to the consistency of sour cream, the gypsum fills the molds well and gives clear imprints. However, the process of increasing the strength of gypsum still continues for some time, and the maximum strength of the plaster impression and plaster model is achieved when it is dried to a constant mass in the environment.
Properties of gypsum:
- Availability,
- Allows you to obtain a clear imprint of the surface of the tissues of the prosthetic bed,
- Harmless
- Does not have an unpleasant taste or odor,
- Virtually no shrinkage
- Does not dissolve in saliva
- It does not swell when wetted with water and is easily separated from the model using the simplest release agents (water, soap solution, etc.).
- Fragility, breakage
- It is difficult to remove from the oral cavity by breaking into fragments
- Doesn't separate well from the model
- Not disinfected.
2. Classification and application.
According to GOST R51887-2002, ISO 6873, all dental plaster is divided into five classes, according to their purpose and hardness:
- Plaster for impressions. Soft and pliable low-hardness gypsum. Used to obtain partial and full impressions (occlusal impressions), including jaws without teeth. This type of gypsum hardens quickly and has the least expansion.
- Medical plaster. Alabaster gypsum of normal hardness. This type of material is suitable for the production of diagnostic anatomical models, as well as models used for planning orthopedic structures. Gypsum of this class is classified as an auxiliary material, since a model made from it has insufficient strength. Thus, impression plaster and medical dental plaster are used only for technical purposes and not for making working models.
- Hard gypsum class. High strength plaster for models. It is used for the manufacture of diagnostic and working models of jaws in the technology of removable dentures, both the entire dentition and those replacing the missing part of the teeth, for the manufacture of the base of fixed collapsible dentures and other products of this series. Unlike ordinary medical plaster, the material of this class has fairly high strength indicators.
- Super hard. Ultra-strong plaster for low expansion models. Gypsum with the highest strength indicators is excellent for making collapsible models of jaws.
- Extra hard, with the addition of synthetic materials. Plaster with adjustable expansion rate. Designed for the manufacture of models requiring particularly high precision.
It is used at almost all stages of prosthetics. It is used to obtain:
- imprint;
- jaw models;
- face masks;
- as a molding material;
- when soldering;
- for fixing models in an occluder (articulator) and a cuvette.
3. Rules for working with plaster.
To successfully perform dental, orthopedic and dental work using dental plaster, it is important to remember certain rules for their use:
- Dental plasters must be stored in a dry place. Plaster storage containers must be cleaned before each new filling.
- Devices and accessories used when working with dental plaster must be clean and free of remnants of previously used plaster.
- One portion of plaster should be the amount needed to fill no more than two or three impressions.
- The use of any hardening accelerators is unacceptable. If necessary, use quick-hardening plaster or increase the mixing time by a few seconds.
- To obtain the desired expansion of gypsum, the ratio of gypsum to water must be very precisely observed.
- Water and gypsum powder should have a temperature of 19-21 ° C.
- The powder must be slowly poured into water, then allowed to submerge in it, and only then begin kneading with a spatula. Machine kneading should not exceed 30 seconds, manual kneading - one minute. The mixture should be poured into the mold immediately after mixing. It is unacceptable to try to increase the pouring time by vibrating or adding water.
- You can remove the plaster model from the impression only when the temperature of the model drops.
4. Mixing plaster.
To obtain a complete plaster cast or model, the plaster mixing technique is of great importance. Approximately one part of room temperature water is poured into a rubber cup and two parts of gypsum are added. Gypsum is poured into a cup in small quantities (this gradual saturation of the gypsum with water prevents the formation of lumps), and then stirred vigorously with a metal or plastic spatula until a homogeneous mass with the consistency of sour cream is obtained.
The strength of the cast and model depends on the consistency of the plaster. When too much water is added to plaster, only the amount needed to form calcium dihydrate is absorbed, leaving the rest of the water free and the cast or model becoming loose. However, you should not reduce the amount of water, because too thickly mixed plaster does not give an accurate impression. In addition, when thickly mixed, pores form in the plaster model due to the fact that air bubbles do not have time to reach the surface through the quickly hardened top layer of gypsum. Good plaster hardens within 6-8 minutes.
The rate of hardening of gypsum depends on a number of factors: temperature, degree of grinding (dispersity), mixing method, quality of gypsum and the presence of impurities in the gypsum. Increasing the temperature of the mixture to +30 - +37°C leads to a reduction in the setting time of the gypsum. When the temperature increases from +37 to + 50°C, the setting speed begins to drop noticeably, and at temperatures above 100°C, setting does not occur. The degree of grinding (grinding fineness) also affects the rate of hardening: the higher the dispersion of the gypsum, the larger its surface, and an increase in the surface of two chemically reacting substances leads to an acceleration of the process. The setting speed of the hemihydrate is also affected by the method of mixing it. The more vigorously the mixture is mixed, the more complete the contact between the plaster and the water will become and, therefore, the faster the setting. Damp gypsum hardens much more slowly than dry gypsum. This plaster is best dried at a temperature of +150 - +170° C.
Catalyst salts are of particular importance when working with dental plaster. They usually speed up the setting process of the plaster. The most effective catalysts are potassium or sodium sulfate, potassium or sodium chloride. When the concentration increases above 3%, they, on the contrary, slow down setting. Most often in dental offices a 2-3% solution of table salt is used as a catalyst. Inhibitors of gypsum hardening are: wood glue, 2-3% borax solution, 5-6% sugar solution, 5% ethyl alcohol solution. When obtaining jaw models, catalysts should not be used:
- firstly, to slow down hardening,
- secondly, to strengthen the gypsum.
There is, as a rule, an inverse relationship between the rate of hardening of gypsum and its strength: the faster the setting occurs, the lower the strength of the resulting product, and vice versa, the slower the mixture hardens, the stronger it is. For example, mixing gypsum with a borax solution results in a noticeable slowdown in hardening, resulting in a very durable product. Substances that change the rate of crystallization can be added both to the water used for mixing and to the gypsum.
5. Obtaining models of jaws from plaster.
Classification of jaw models:
1. By purpose:
- diagnostic, which are subject to study to clarify the diagnosis and plan the design of the future prosthesis;
- control tests, which are inherently diagnostic, as they record the condition of the oral cavity before, during and after treatment. They are also called production models;
- workers who make dentures and devices;
- auxiliary - models of the dentition opposite the prosthetic jaw.
2. According to the conditions of receipt:
- non-separable (monolithic), created by using one portion of the same type of material by an orthopedic dentist or his assistant in the treatment room (for example, in the case of using alginate impression materials that shrink quickly) or by a dental technician in the plaster room of a dental laboratory.
- collapsible, created by a dental technician in the laboratory. According to their intended purpose, these are always working models of jaws;
- fireproof, created by a dental technician from fireproof materials after duplicating plaster models of jaws in a special ditch. According to their intended purpose, these are always working models of jaws intended for casting metal alloys on them.
One-piece plaster model of the jaw. Method of obtaining:
1. Assessment of the quality of the impression by a doctor. An impression is considered suitable if the relief of the prosthetic bed is accurately imprinted (including the transitional fold, contours of the gingival margin, interdental spaces, dentition) and there are no pores, stretch marks, or smears of the relief with mucus on its surface.
2. Preparing the impression. After washing under running water at room temperature, the impression must be disinfected using one of the known methods. To relieve internal stresses in the impression material and improve wettability (fluidity of gypsum), the surface of the impression is treated (by immersion, application with a brush or in the form of an aerosol) with a special liquid for removing surface tension (for example, Hera-SBE; Fixacryl, etc.).
3. Preparation of plaster. Mixing gypsum powder and water. Gypsum mixed to the consistency of sour cream fills the molds well and gives clear imprints.
4. Filling the impression involves adding portions of gypsum using a spatula (manual version) or directly into the impression through the outlet nozzle of a vacuum mixer (mechanized or hardware version). To eliminate porosity and cavities in the plaster model, filling the impression with plaster is accompanied by shaking and beating it, but the most justified option is the use of special devices - vibrating tables. After filling the dental impressions, plaster with some excess is placed over the surface of the impression material and the formation of the base of the model begins.
5. The design of the base of the plaster model is carried out in the following ways:
- using a spatula. To do this, the plaster is placed in a mound on a smooth, flat surface of the table and the impression filled with plaster is tipped onto it so that the height of the base is 1.5-2.0 cm, and the bottom of the impression tray is parallel to the surface of the table. Excess plaster around the perimeter of the impression and impression tray is removed with a spatula. In this case, the angle of the edges of the base of the plaster model of the jaw with the surface of the table is 90°;
- using a standard rubber hollow mold (split) for the base, into which, after filling it with plaster, a plaster-filled impression is placed;
- using elements of articulation bases included in most modern articulators.
6. Removal of the impression tray and impression material from the jaw model is carried out after crystallization of the plaster. In this case: in the case of using elastic impression materials, sequentially, using tools (spatula, scalpel, tweezers, etc.), remove the impression tray, and subsequently the impression material, cutting it into fragments; in the case of using thermoplastic materials, pre-heating of the impression material with warm water is required. In this case, as a rule, the tray is removed along with the impression material.
7. Mechanical processing of the base of the plaster model of the jaw using cutting tools (gypsum knife) and special devices (edging machine), aimed at giving it uniform thickness and parallelism of the side edges by removing excess gypsum.
Attention!
If you need help with academic work, we recommend turning to professionals. More than 70,000 experts are ready to help you right now.
Cost calculation Guarantees Reviews
Collapsible plaster models. In world dental practice, there are a large number of methods for creating collapsible plaster models. At the same time, the main material for models in all systems is gypsum of the 3rd and 4th classes (according to ISO). There are three main ways to create collapsible plaster models of jaws:
Attention!
If you need help with academic work, we recommend turning to professionals. More than 70,000 experts are ready to help you right now.
Cost calculation Guarantees Reviews
1. Without pins, using resin base model. Easy to use, as it does not require the use of special hammer drills and special glue. In addition, this method saves supergypsum and time for its preparation. Consists of the following main stages:
1) preparing the print (the edges of the print are trimmed so that it fits tightly to the base of the polymer base);
2) preparing a polymer base with retention guides. After aerosol application of an insulating layer on the inner surface of the polymer base and retention guides, the latter are installed in their places in the base. The application of such insulation is necessary for the free removal of retention guides with fragments of the dentition model from the base;
3) obtaining the model: the impression and base are sequentially filled with superplaster on the vibrating table, after which the impression is installed in the base;
4) separation of the impression from the model, which is carried out after crystallization of the gypsum;
5) removing the model from the base using a special press (in this case, the retention guides freely come out of the base);
6) removing excess gypsum with a carbide cutter and sawing the model into fragments using a jigsaw or using a diamond blade;
7) installation of fragments of the model after processing in their place for further modeling of frames of solid-cast bridges.
2 Using pins and a polymer model base. The sequence for obtaining a collapsible model is as follows:
1) preparing the print (the edges of the print are trimmed to create a uniform fit to the marking plate);
2) strengthening the print with special material on a stand with one vertical wall, on which there are two slots for fixing the marking and main plates;
3) installation and centering of the transparent marking plate. At this stage, future cutting lines of the model are outlined. Thanks to the presence of many holes identical to each other, it is very easy to install marking pins that will exactly match the working pins;
4) preparing the base working plate: covering the working plate with a self-adhesive protective film. The marking plate is removed from the stand and aligned with the working plate. In this case, the marking pins, pressed through the protective film on the working plate, mark the holes for the working pins. The remaining film in the holes is cleaned using a hand cutter;
5) installing working pins that have a conical shape (one end of the pin has retention notches for fixation in plaster, the other is flat, exactly matching the internal shape and diameter of the holes in the working plate) on the prepared base working plate;
6) immersing the working plate with pins in supergypsum, which fills the impression;
7) removing the working plate with the model from the impression after the plaster has hardened;
 separation of a fragment of the dentition from the base of the model. This manipulation, thanks to the self-adhesive film, is carried out quite easily and quickly. Subsequently, excess gypsum is removed with a carbide cutter, the model is sawed using a thin diamond disk of a certain diameter into fragments of the dentition, which, after appropriate processing, are again installed on the working plate.
3. Using pins and a plaster model base. Stages:
1) edging the print with a special silicone paste to level the height of its edges;
2) filling the impressions of the dentition in the impression with supergypsum. After the plaster has hardened, the model of the dentition is removed from the impression, excess plaster is removed from the outside and inside using a cutter;
Attention!
If you need help with academic work, we recommend turning to professionals. More than 70,000 experts are ready to help you right now.
Cost calculation Guarantees Reviews
3) leveling the surface relief of the dentition model, which will face the base;
4) creating holes in the model of the dentition using a puncher, where double pins with a metal sleeve are inserted and fixed with glue using a holder;
5) applying insulating agents and installing metal bushings that will be located in the future base of the model, after the glue has dried on the surface of the model fragment (dentition);
6) obtaining the base of a collapsible plaster model of the jaw. To do this, use a standard rubber mold for the base of the model, into which supergypsum is added in portions. When filling the base rubber mold of the model, a portion of supergypsum is applied to the area of the bushings to prevent the formation of pores, after which the model of the dentition is placed in the rubber mold;
7) removing the model (after crystallization of the gypsum) from the rubber mold, removing excess gypsum and grinding the base using a special edger;
separating the dentition from the base and sawing it into fragments, which, after processing, are installed back on their sockets in the base.
List of sources used
1. V. N. Trezubov, L. M. Mishnev, E. N. Zhulev, V. V. Trezubov. Orthopedic dentistry. Applied materials science: a textbook for students. – M. “MEDpress-inform”, 2011. – P.21-22, 230-233 2. E. S. Kalivradzhiyan, O. N. Shaleev, T. A. Gordeeva, A. A. Erofeev, A. S Ohanyan. “The use of gypsum in orthopedic dentistry: features and prospects.” – Department of Orthopedic Dentistry, Voronezh State Medical Academy, Ministry of Health and Social Development. LLC "Celite" 3. https://dentalc.ru/articles/27-poluchenie-gipsovyx-modelej-chelyustej.html 4. A.I. Doinikov, V.D. Sinitsin “Dental materials science”. – M.: Medicine, 1981
How to avoid defects in model making
From the description of the technology for making models from dental plaster, it is clear that there are subtleties that must be observed to avoid defects. Let's list the main ones.
First of all, the condition of the jaw impression being filled with wax: it must be free of saliva. Another important aspect is that the structure of the material used is porous. The use of vibrating tables minimizes the risk of cavities.
If there is no such equipment, watch your own manipulations. Be careful when separating the model from the print; if necessary, tap it with a special hammer. Use isolating solutions before pouring the dental plaster to make it easier to separate the model from the impression.
During work, always pay due attention to maintaining the required temperatures of water and material, their proportions, and consistency. Be aware of proper storage conditions, containers and tools. To achieve the highest quality and fastest results, combine, if possible, manual and machine processing.
Wetting the model
Sudden temperature changes can increase the fragility of the plaster model, which can cause it to wear out quickly.
Therefore, if steam or other heat treatment is necessary, it is recommended to moisten the sample.
Also, short wetting helps prevent the structure from breaking during sawing or preparation.
From the video you will learn how to create a plaster model.
Model defects
To avoid spreading of the sample and other unpleasant surprises, the cavity between the gypsum composition and the alginate mass should be treated.
For this, a neutralizing solution, water or dry gypsum powder can be used . Instructions for using polyester impression material are indicated in the instructions.
How do you get the material?
The crystals are colorless and transparent. However, all kinds of impurities, such as clay, pyrite, quartz or carbonate, color them in various shades - from pink to black. To obtain dental gypsum, the material at the first stage is cleaned of impurities and crushed to a powder state.
Next, the natural material is heated to a temperature sufficient to remove some of the water. There are several manufacturing methods. As a result of their use, medical, model plaster and super plaster are obtained. The composition of medical gypsum of all varieties is identical - (CaS04)2 - H20.
The material differs in structure and particle shape:
- The hemihydrate obtained by firing is medical gypsum (β-hemihydrate). The process of its manufacture is heating in an open boiler until some of the moisture evaporates. The material turns out to be porous and loose. Before use in dental practice, the powder is mixed with water in a 2:1 ratio.
- Model plaster (a-hemihydrate) is produced by autoclaving. When mixing non-porous powder with water, the following proportions are used - 5 parts of gypsum particles to 1-1.5 parts of water.
- To obtain super dental gypsum, the boiling method with the addition of chloride (magnesium or calcium) is used. Chlorides act as deflocculants, preventing the formation of flocs and promoting particle separation. When adding water, the traditional ratio is 5:1.
Video from a specialist:
Where can I buy
Medical gypsum is produced by companies that produce products for construction and finishing works. Its main difference from gypsum for construction purposes is the degree of grinding, and as a result, faster hardening times. You can purchase plaster for medical practice directly from the manufacturer. One of the leading companies is Volma.
Reviews
Plaster is a versatile dental material. The stability of its characteristics and quality, as well as its correct use, facilitate the work of specialists and increase the aesthetic and functional characteristics of prosthetic structures.
At the same time, the material improves the outcome of human treatment, and therefore affects the quality of his life.
You can share your opinion about the advisability of using gypsum in dentistry and its role in dental prosthetics by leaving it in the comments to this article.
Sources:
- https://vashyzuby.ru/protezirovanie-implantatsiya/kak-rabotat-s-gipsom.html
- https://dentazone.ru/preparaty-oborudovanie/materialy/gips-stomatologicheskij.html
- https://medicine-simply.ru/just-medicine/71
- https://FB.ru/article/414390/gips-meditsinskiy-sostav-i-svoystva-gipsa-meditsinskogo
- https://zubovv.ru/protezirovanie/semnyie-p/rabotyi-s-gipsom-v-stomatologii.html
- https://www.vash-dentist.ru/protezirovanie/semnyie-p/gipsa-dlya-ortopedicheskoy-stomatologii.html