There was one unpleasant story in my life. The eldest son, then about 7 years old, began to experience a sharp decline in hearing. Like all normal parents, I took him to all the doctors who prescribed a bunch of medications and scared him of complete deafness. We suffered enough then... The last hope was an ENT doctor with extensive experience. “Traffic jams,” he announced his diagnosis and sent us to the treatment room.
There, with the help of terrifying hooks that looked like dental instruments, they pulled out the wax for my child. The whole problem, including hearing problems, was due to the fact that the plugs were dry, because they had been forming for many years, as I understood from the angry tirade of the same ENT specialist, almost from birth. After all, I, a caring mother, removed the sulfur almost every other day and at the same time tried to get as deep as possible. Like this.
Since then, we don’t clean our ears at all, but wipe the sink with a cotton pad, only getting it lightly into the passage. This is what I advise everyone to do. But this is when we clean for children, but for ourselves? After all, most people use cotton swabs and also try to penetrate as deeply as possible inside. Let's find out how to properly clean your own and your children's ears.
Why does sulfur appear?
Earwax is a very interesting in its composition and a very powerful antibacterial substance. You've probably noticed that sometimes in a week it doesn't come out of your ear even once, but sometimes you have to clean your ears almost every day. This depends on how much the hearing organ has been exposed to bacteria and microbes, as well as ordinary dirt.
Wax forms in the area of the eardrum, and then, together with dead cells and collected “garbage,” moves out. If you do not clear wax from your ears in a timely manner, it will accumulate and turn into plugs. Some can be removed on your own at home, while others can only be removed with the help of a qualified doctor.
Most often, this problem is encountered by people who use hearing aids, earplugs, and those who do not clean their ears correctly.
Inside the toilet
The inside of the toilet itself is filled with fresh water. However, when it enters the bowl, it mixes with various bacteria. For example, there is mold, as well as those rusty marks that are simply impossible to get rid of.
Most homes have a special toilet brush that is located near the toilet. It is incredibly useful when you want to do some cleaning. However, be aware that this tool is incredibly messy. If your brush was originally white, it will gradually change to a rusty color as bacteria grows on it. In fact, keeping a toilet brush clean is almost as difficult as keeping the toilet itself clean.
How to clean a baby's ears
There is nothing wrong with removing wax from the ears of a newborn baby. Unless it occurs to mom or grandma to get inside the ear canal.
In fact, all smart publications recommend doing this twice a day for up to six months: morning and evening. But as practice shows, and as experienced pediatricians say, one time after an evening bath is more than enough.
Cleaning consists of wiping the ear with a cotton swab or disk . For each small ear you need to take a new one. To avoid any questions, you need to watch in the maternity hospital how the doctor cleans your ears, and at home ask the visiting nurse to explain everything in detail again.
It is much more difficult to ensure that water does not get into the tiny ears while bathing. To avoid this, in the first months the young mother should bathe the baby together with the father or other helpers. If this happens, it's okay. Just place the child first on one side, and then on the other, lightly massage the area around the ears and the water will flow out.
Rinse your ears with hydrogen peroxide every 7-10 days. Just drop 1-2-3 drops into each ear canal and let the baby lie on that side for a couple of minutes, then turn it over and repeat the procedure. Afterwards, do not forget to wipe off any remaining drops well.
From 6 months, the frequency of ear cleaning can be reduced to 2-3 times a week.
Cleaning pomegranate beautifully
If you want to surprise your guests and beautifully serve pomegranate on the table, use the following instructions:
- Wash and dry the fruit well. Make sure that the surface of the peel is completely dry - otherwise it will be difficult to remove.
- Cut off the top part - the crown. You need to make a perfectly round cut. Be careful not to damage the grains inside the core.
- Alternately make about 6 cuts on all sides of the fruit. As a result, the peel should take the shape of petals.
- Using a sharp knife, make a circular cut in the middle.
- Remove the resulting petals. They separate exactly up to half of the pomegranate.
- Lightly press down the middle to remove any membrane remaining at the top of the fruit.
There is also a second method of figure-cleaning the fruit. The only difference is that the formed petals are turned in the opposite direction (without grains). As a result, the pomegranate will resemble a flower, the petals of which will be pomegranate peel, and the core will be red grains.
How to clean an older child's ears
The procedure for cleaning children's ears is the responsibility of the parents. The easiest way is to do this once a week after bathing. Then all the excess sulfur dissolves and comes out on its own. All that remains is to simply wipe it with a cotton pad.
There is no need to poke a cotton swab into your child’s ear , even if a crust is clearly visible in the ear canal.
Wait, she will come out on her own. Or use one of the ways to get a cork, which we will describe a little later.
How often can you cleanse your face depending on your skin type?
Cosmetological manipulations with the dermis of the face to one degree or another disrupt the epithelium, so the frequency of procedures depends on the type of skin. If you clean more often than necessary, the procedures can only cause harm.
For oily and combination skin types
Professional cosmetic manipulations help normalize the secretion function of the sebaceous glands. This includes cleansing pores from sebum blockages and preventing inflammation of various etiologies.
How often you visit a cosmetologist depends on the chosen method of cleaning and the physical condition of the skin.
As a rule, when contacting a specialist for the first time, deep cleaning is carried out in several visits, then it is necessary to carry out the procedure at least once every 2 months.
For dry skin types
If the face is dry, sensitive to mechanical stress and cosmetic preparations, atraumatic methods are used. The dermis with a fine structure requires the selection of cleansing, disinfecting, softening, nourishing and moisturizing agents.
Techniques are used to enhance blood circulation in the vessels of the upper layer. After the procedure, it is recommended to use restorative compounds for several days. Dry skin can be cleansed every 4-6 months.
For normal skin type
Having a normal type of facial skin is a great happiness; the owner only has to maintain a fresh appearance and take preventive measures from time to time - make gentle vitamin masks, use nourishing creams.
With normal dermis, cosmetologists recommend only manipulations to prevent problems from occurring. More careful care will only be required as you age. Desirable procedures are a course of superficial peeling using a hardware method, the frequency of sessions is no more than once every 3-4 months.
How to clean an adult's ears
Few people take a full shower in the morning. There simply isn’t enough time for this. But everyone washes themselves.
Only this procedure does not consist of rinsing the face and brushing the teeth, but also washing the ears and neck. The ears and the area behind them should be thoroughly soaped, rubbed, and then rinsed with warm water and wiped dry with a towel.
After such a procedure there should be no wax, but once a week it still won’t hurt to additionally wipe the ear canal with a cotton pad or swab.
Adults can also use cotton swabs, but inserting them more than 0.3-0.5 cm inside is dangerous.
Sulfur should not be directly cleaned from the walls. This protective covering is necessary.
Sometimes adults tell the doctor: “I cough when I clean my ears.” This is a sign that cleaning is not being done correctly. The laryngeal nerve is located on the lower wall of the auditory canal, and when irritated, a similar reflex occurs. If you know this feeling, then you are inserting the Q-tip too deep.
The nature of the hearing organs
Numerous modern studies prove that a healthy inner and middle ear does not require special cleaning at all , which usually involves the use of cotton swabs and special hygiene products.
The only exception is the outer part of our hearing organs - the beginning of the auditory canal and the auricle. The fact is that human ears, like many other organs, are endowed with the ability to cleanse themselves.
This means that the procedure for penetrating a cotton swab deep into the ear canal is not provided for by nature, but is only imposed on a person as part of the marketing strategies of companies producing ear care products.
The release of wax that accumulates in the ear canal, as well as exfoliating epithelium, occurs as a result of habitual human activity : taking a shower or bath, communication, eating and other processes that involve movement of the lower jaw.
When a malfunction occurs in the functioning of the body and, in particular, the organs of hearing, wax in the ears can be produced in larger quantities, or it may stop being produced altogether. However, in the latter case there is no need to rejoice, because earwax is:
- natural antimicrobial agent , which prevents the proliferation of active pathogenic microbes in the ears;
- moisturizer , thanks to which the hearing organs function correctly, without distorting the data perceived by hearing (loudness, clarity of sound);
- a means of self-cleaning , because together with sulfur during bathing or jaw movement, everything unnecessary is removed from the ear canal - dead skin cells, dust caught with wind currents, and other foreign objects.
Important! Under normal conditions, earwax is produced in an amount that does not cause inconvenience to the owner of the ears: it does not spoil the appearance or impede the functioning of the hearing organs.
Precisely because wax is an integral part of the ear organs, its aggressive removal from the ear canal is undesirable.
Firstly , due to the use of cleansers and cotton swabs, the sebaceous glands that produce sulfur are stimulated: acting according to the “reverse” rule, the sebaceous glands begin to produce sulfur even more intensely.
Secondly , if, as a result of a malfunction, increased production of sulfur is impossible, then the ear canal is subject to ailments such as allergies, itching, and a feeling of dryness.
If intensive ear cleaning suddenly stops, then the earwax produced with increased intensity can turn into a “headache”, because wax plugs are inevitable, impairing hearing.
To avoid all these problems, every conscientious citizen needs to know how many times you need to clean your ears, how to do it correctly and - most importantly - how not to harm your own ears.
How to remove wax plug
There are several options for carrying out this procedure yourself. You can buy special drops that have a dissolving effect. They need to be dropped into the sore ear, lie down for 1-2 hours on the other side so that the plug dissolves well, and then turn over and go to bed. Then in the morning you will find pieces of sulfur on your pillow.
Salt water works well . You need to dissolve a teaspoon of coarse salt in 100 ml of warm water, drop 4-8 drops into your ear, count to 10 and lower your head so that the drops flow out. The traffic jam will begin to come out with them. Repeat until the solution runs out.
Such washing can be done using a soda solution. It is prepared from a quarter spoon of baking soda and 2 tablespoons of water. Apply no more than 3 drops at a time.
You can use regular baby oil to dissolve the plug. Just 1-2 drops in the sore ear before bed for a week is enough to quickly forget about the problem.
Please note that these methods are suitable for “young” traffic jams. A plug that has recently formed is still soft and will easily come out of the ear.
If you are not sure about this, it is better to consult a doctor. If these solutions are used on a dry plug, it will swell and begin to press on the eardrum, causing severe pain. And after removing the plug, the ear needs additional protection from cold and drafts.
Learning to clean correctly
Not everyone knows that you can peel a pomegranate quickly - the royal berry scares many people with its size and thickness of the skin. Don't know how to approach? We will not just help you get to the “insides” of the fruit, but we will teach you how to present it beautifully and save you from bright splashes.
We hasten to warn you - it is better to wear unnecessary clothes that you don’t mind ruining. Removing juice stains is very difficult, do not take unnecessary risks if you are not confident in yourself.
Let's try to clean the pomegranate quickly and without splashing? Catch detailed instructions:
- Carefully remove the lid - make a circular cut along the top and pull the skin towards you;
- Now cut the fruit from top to bottom along the white partitions;
- Carefully open the pomegranate - pull each piece with your fingers, tearing it away from the others;
- Use your hands to remove the white films and serve the “flower” to the table.
Watch the video - anyone can easily peel a pomegranate. You will receive a beautifully decorated berry that can be used to decorate the table. You will have to remove the grains with your fingers.
Advice! Make the fruit even more beautiful - cut the peel into shapes, triangles or ovals along the top.
Now let’s figure out how to peel a pomegranate quickly and easily, using a little effort!
- Cut the berry into two halves - you don’t have to remove the cap;
- Invert the half over a bowl, skin side up;
- It is better not to raise your hand to reduce the likelihood of flying splashes;
- Gently start tapping the skin with a spoon/spatula - gradually the berries will begin to fall out into the bowl and you will not have to peel them from the partitions.
Also recommended: Centenary Egg
If you couldn’t peel a pomegranate without much effort, here’s another video to help you! Look at the step-by-step description of the process and try to repeat the instructions yourself.
And we are moving on to the underwater method - don’t be alarmed, it’s simple. This option allows you to forget about traces of juice, but requires a little more time.
- Cut off the crown of the berry with a knife;
- Divide the fruit into several parts - you can cut or break it;
- Place it in a bowl of cold water;
- Start removing the grains with your hands - apply pressure, the filling will easily jump out of the film.
Are you done? Not only berries float in the water, but also the husks:
- Drain the liquid through a colander;
- Remove unnecessary parts of the fruit.
Ready! Do you know how to peel a pomegranate underwater? A little imagination, a bowl and strong hands - nothing is impossible.
Did you know that each fruit contains 700-1000 seeds? Surprising but true. You can eat them with your hands or with a spoon - there is no 100% rule, decide for yourself.
How to peel a pomegranate is up to you to decide. We offer you the following method for removing the peel and extracting delicious seeds.
- Remove the crown - carefully cut it off with a knife;
- Divide the fruit into four parts - move the knife along the white membranes;
- Take the slice in your hand and pull the edges towards you so that it turns in the other direction;
- The grains will begin to separate on their own; you won’t have to clean them.
We also recommend: How to dilute gelatin?
How to choose a fruit
You will quickly learn how to peel a pomegranate quickly and correctly - make sure that the purchased fruits are ripe and full of juice. A few words about how to choose quality berries:
- The skin should be dry, thin - the seeds can be clearly felt under it;
- The crown is dry - if it is wet, then the contents are not ripe;
- The color is not green - but red or pink;
- There should be no cracks, breaks or obvious stains on the surface.
We advise you to remove the fruits from the bottom of the box - they are protected from sunlight, which negatively affects the taste and quality. Before use, be sure to rinse thoroughly in hot water to remove the paraffin that is used on each fruit.
How to properly care for your shoes
Even if you take care of your shoes, dust and dirt accumulate on them during everyday wear. You can purchase special aerosols for cleaning shoes in stores. It is important to select them according to the type of material from which the shoes are made.
And if the shoes are not only dirty, but also smell, then to get rid of the unpleasant odor, you can soak the insoles for an hour or two in a vinegar solution, which is quite easy to prepare. To do this you need to take 1 tbsp. l. vinegar and dilute with 1 glass of water.
The shoes themselves should be well ventilated in the fresh air and then wiped with a weak solution of potassium permanganate. To remove unpleasant odors, stores sell various deodorants, sprays, tablets, as well as insoles with special impregnation that prevent its appearance.
15 ways to scale fish quickly
In the package
The perfect way to clean without getting everything dirty. The main thing is not to tear the package.
Place the fish in a bag and carry out all the manipulations inside. The correct action is to take her by the tail so that her head is down. Use sharp movements to move the knife in the direction opposite to the growth of the scales.
First the sides are cleaned, then the belly.
Afterwards, wash the carcass well again.
In water
Place the fish in a bowl of water (or a filled sink). This way the scales will also not fly apart. Then proceed exactly the same as in the previous method.
Stocking
You will need a sharp knife. It is carefully inserted into the incisions near the head between the scales and the skin, and it is removed entirely, as if with a stocking. This is a rather lengthy process, but it definitely guarantees that nothing will fly around.
Using boiling water
Using this method, you can clean fish from scales quickly and easily. Place it in boiling water for a few seconds. After this, the scales come off very quickly. The method is good both for cleaning large fish and for varieties with small, tightly fitting scales. However, it is believed that after heat treatment, some of the beneficial properties of the product are lost.
By boiling
Cook the carcass unpeeled, and then easily peel it with a knife.
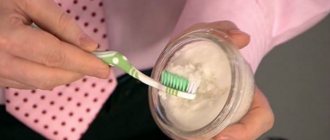
How often can you brush your teeth with activated charcoal?
It is immediately worth noting that activated carbon is an abrasive substance. It cannot be used frequently as it acts deeply and over time the enamel can become thinner. There are also a number of contraindications that should be taken into account before proceeding with the procedure.
The cleaning course program must be drawn up by a dentist. If you do not want to contact specialists, keep in mind that there should be breaks of at least 4-8 weeks between courses, and the number of procedures within one monthly course should not exceed 20 sessions.